DVB-T Tuner Setup in TVHeadend
This guide walks through adding a DVB tuner directly in the TVHeadend UI when running Headendarr AIO.
It covers:
- passing
/dev/dvbinto the container - enabling the adapter in TVHeadend
- creating a DVB-T/T2 network
- scanning muxes and mapping services to channels
Prerequisites
- Headendarr AIO is running.
- Your host OS can see the tuner (for example under
/dev/dvb/adapter0). - Antenna/cable is connected to the tuner.
1. Pass /dev/dvb Into the Container
TVHeadend cannot see DVB hardware unless the device nodes are available inside the container.
Docker Compose
Add this to your Headendarr service:
services:
  headendarr:
    devices:
      - /dev/dvb:/dev/dvb
If you also use hardware acceleration, add:
devices:
  - /dev/dvb:/dev/dvb
  - /dev/dri:/dev/dri
Unraid (Extra Parameters)
In Advanced View, set Extra Parameters:
--device=/dev/dvb:/dev/dvb
Optional with GPU:
--device=/dev/dvb:/dev/dvb --device=/dev/dri:/dev/dri
Verify from Container Shell
ls -la /dev/dvb
ls -la /dev/dvb/adapter0
You should see character devices like frontend0, demux0, and dvr0.
2. Open TVHeadend UI
All steps in this guide are done in the TVHeadend backend UI.
- In Headendarr, click Show TVHeadend Backend in the header.
- This opens the TVHeadend UI in a popup dialog.
- Continue in that popup (or open it in a separate tab/window if preferred).
- Go to
Configuration -> DVB Inputs -> TV adapters. - Confirm your adapter appears.
If it does not appear:
- re-check
/dev/dvbmapping - restart the container
- verify host has loaded tuner drivers
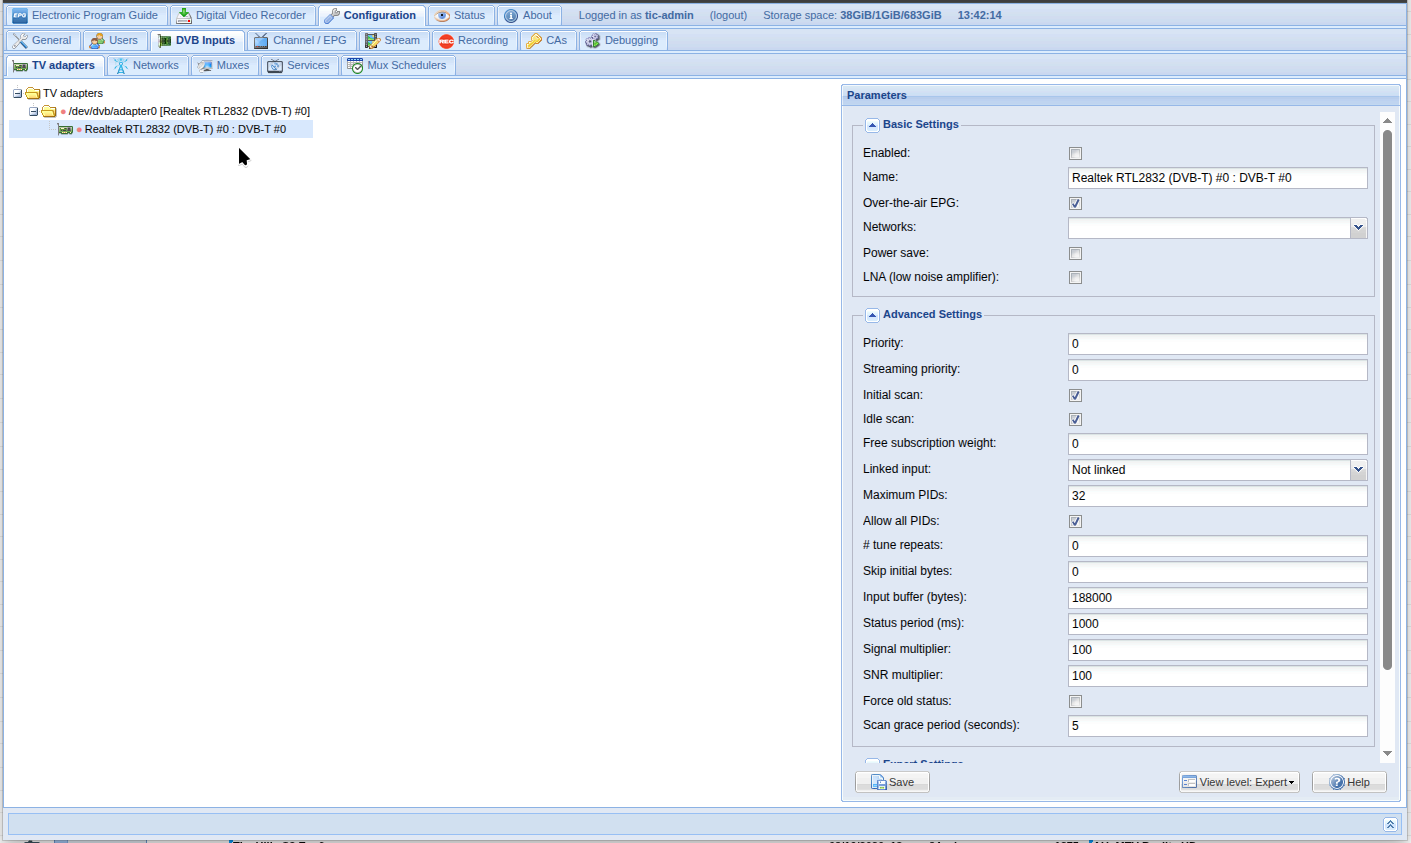
3. Enable Adapter
- Click your adapter in
TV adapters. - Tick Enabled.
- Save.
4. Create DVB-T/T2 Network
- Go to
Configuration -> DVB Inputs -> Networks. - Click Add and choose DVB-T Network.
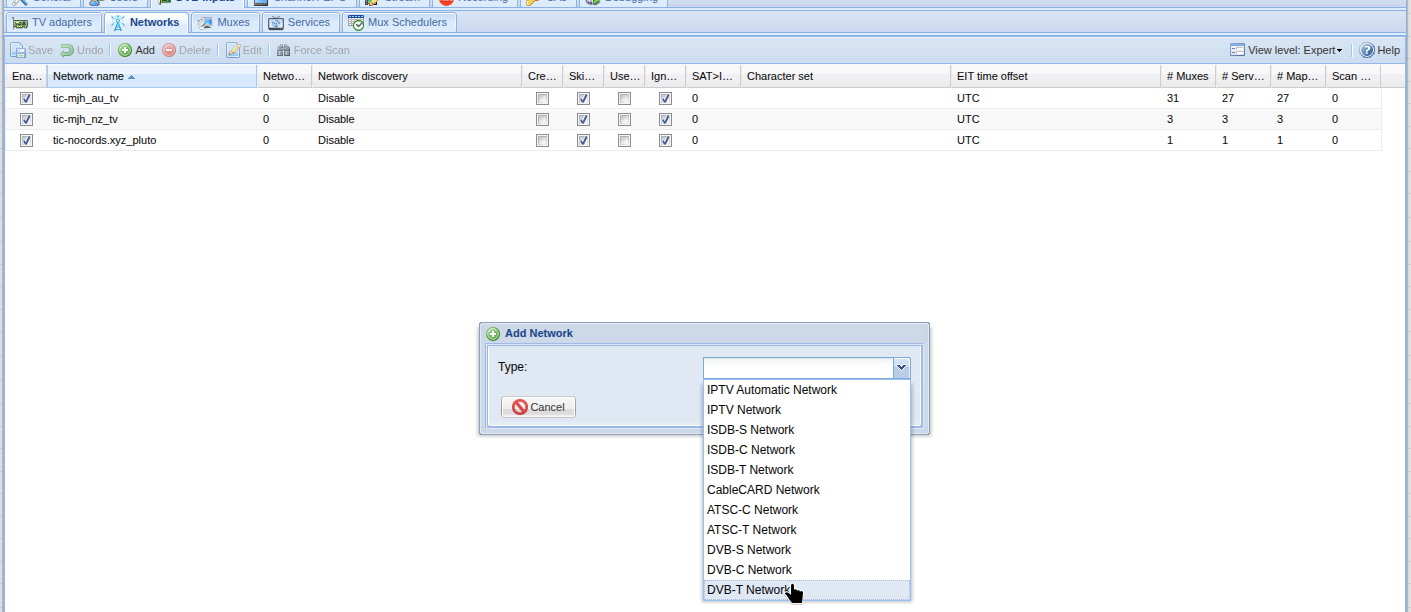
- Configure:
- Network name: e.g.
dvb-t-local - Pre-defined muxes: choose your country/region transmitter list
- Leave scan options at defaults to start
- Network name: e.g.
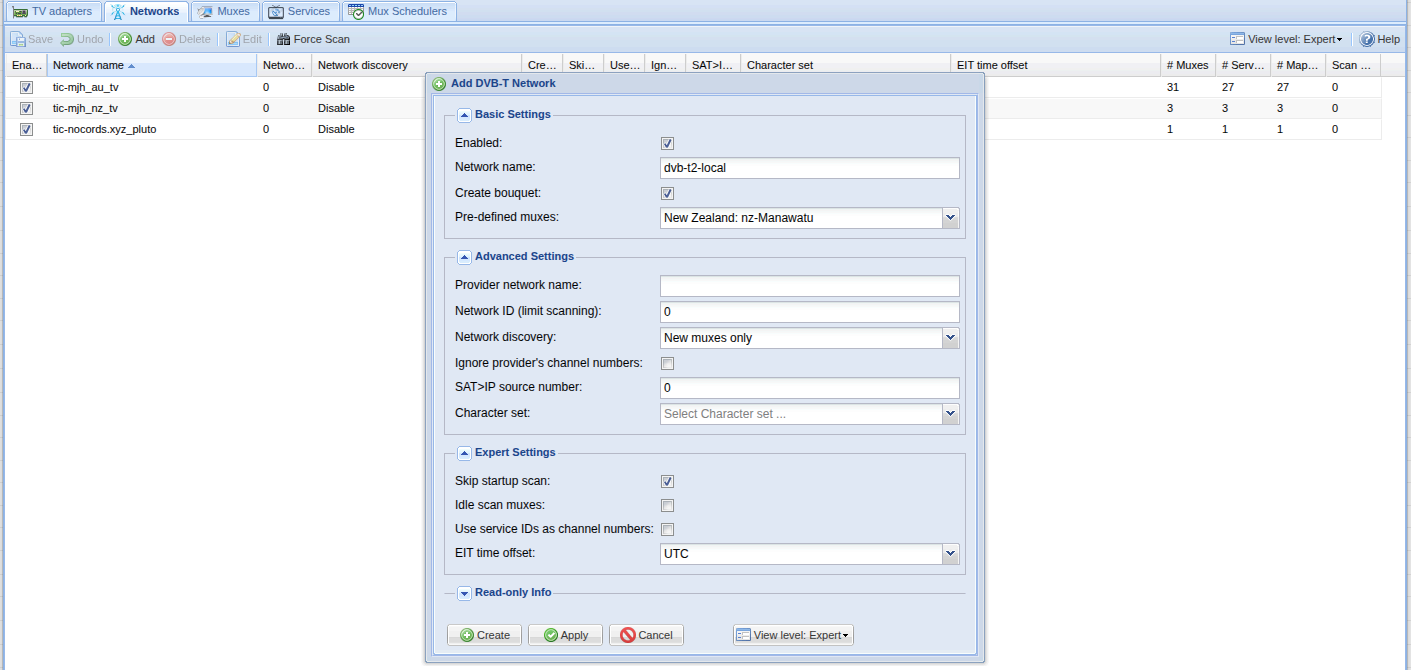
- Click Save.
5. Assign the Network to the Adapter
After creating the network, you must apply it to your tuner adapter.
- Go back to
Configuration -> DVB Inputs -> TV adapters. - Select your tuner adapter.
- In Networks, select
dvb-t-local(or whatever network name you created).
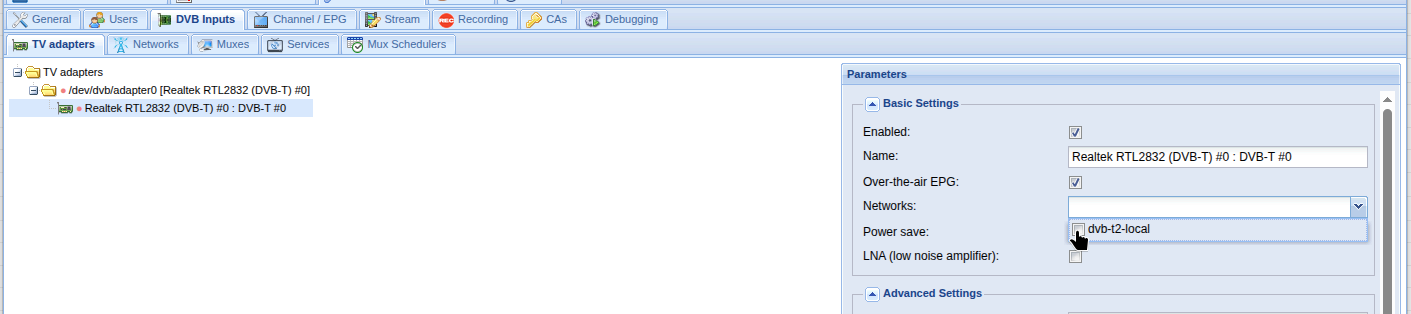
- Click Save.
6. Scan Muxes
- Go to
Configuration -> DVB Inputs -> Muxes. - Wait for scan to progress.
- Confirm muxes move toward OK state.

If all muxes fail:
- confirm antenna signal
- confirm correct transmitter/region list
- test with a narrower or correct local pre-defined mux set
7. Review Discovered Services
- Go to
Configuration -> DVB Inputs -> Services. - Filter by your DVB network/adapter.
- Confirm services are discovered.
8. Map Services to Channels
- In
Services, select the services you want. - Click Map selected (or map all).
- Start with defaults, then adjust as needed:
- create provider tags
- merge options
- channel number policy
- Save.
Channels will now appear under Configuration -> Channel / EPG -> Channels.
9. Optional: EPG and OTA Metadata
For DVB broadcast EPG:
- Go to
Configuration -> Channel / EPG -> EPG Grabber Modules. - Enable relevant OTA modules (for your region/standard).
- Confirm guide data starts populating.
You can also continue using XMLTV via Headendarr if preferred.
10. Validate Playback
- Test playback in TVHeadend web player or your client.
- Confirm audio/video starts quickly and is stable.
- Check TVHeadend logs for tuner lock/signal errors if needed.
Notes for Headendarr Users
- Headendarr-managed IPTV networks are normally prefixed with
tic-. - For manually managed DVB networks, use your own naming (for example
dvb-t-local) and manage them in TVHeadend directly. - Avoid renaming manual DVB networks to
tic-*to prevent confusion with Headendarr-managed objects.