Channel Configuration
This is the core of Headendarr, where you build your final channel lineup. The Channels page allows you to add channels, assign streams from your sources, link EPG data, and organise everything to your liking.
Adding Channels
On the Channels page, there are two distinct buttons for adding channels, each with a different purpose.
Method 1: Bulk Import via "Import channels from stream source"
This is the most powerful and recommended method for adding channels.
- Click the Import channels from stream source button.
- A dialog will appear, allowing you to search and filter through every channel available from all your configured sources. This is efficient for navigating hundreds of thousands of potential channels.
- Select one or more channels from the list.
- Click Add.
Headendarr will automatically create new channels, populating the name, logo, and stream source. It will also attempt to intelligently link EPG data by matching the channel's name to an EPG entry, if available.
Method 2: Manual Creation via "Add Channel"
This method is for creating a single, custom channel from scratch.
- Click the Add Channel button.
- An empty channel configuration dialog will appear.
- You must manually fill in all the details, including the Channel Name, Channel Number, Stream Sources, Logo URL, EPG link, and any tags.
Editing a Channel
After creating a channel using either method, you can click on it in the main list at any time to open the edit dialog and fix up any missing information or change its configuration.
Adding Manual Stream Sources
Inside a channel's settings dialog, you can add a source that is not tied to a configured Source playlist.
- Click Add Manual URL in the Channel Streams section.
- Set the Stream URL.
- Optionally enable Use HLS Proxy to route that manual stream through Headendarr's internal HLS proxy.
You can use this for:
- direct provider stream URLs
- raw MPEG-TS stream URLs
- HLS
.m3u8URLs - external HLS proxy URLs (for chained proxy setups)
Manual sources are not linked to a Source playlist, so they are not governed by per-source connection limits.
They still appear in generated client outputs (playlists/lineups), but they do not consume or enforce a Source playlist connection cap.
Stream Priority and Failover
Headendarr allows you to add multiple stream sources to a single channel. This creates a powerful failover system.
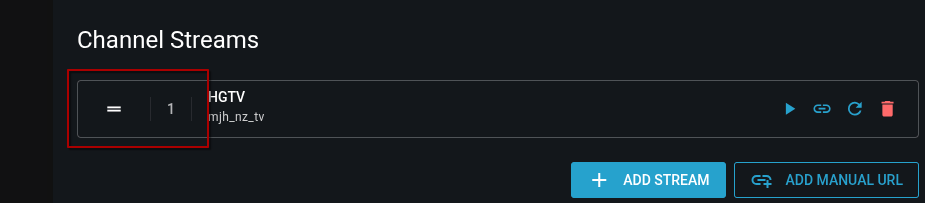
- Priority: Inside a channel's settings, the streams are listed in order of priority (from top to bottom). The stream at the top of the list will always be tried first.
- Failover: If a client requests a channel, TVHeadend will try the highest priority stream. If that stream is unavailable, or if the connection limit for that source (as configured on the Sources page) has been reached, TVHeadend will automatically move to the next stream in the priority list.
- Reordering: You can drag and drop streams within the channel's settings to change their priority.
Organising and Reordering
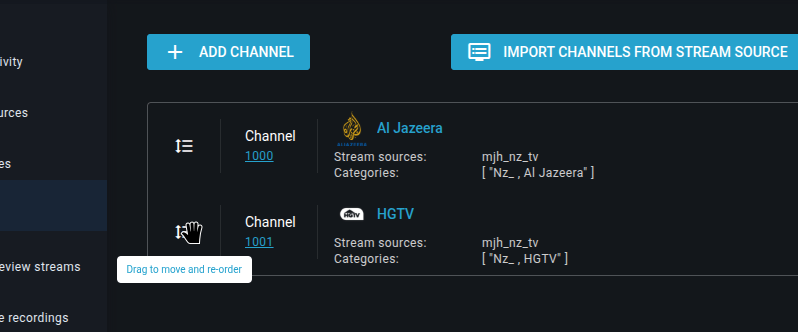
- Channel Numbering: The channel list is ordered by channel number.
- Drag-and-Drop: You can easily reorder your channels by dragging and dropping them within the main channel list. This will automatically update their channel numbers.
Bulk Updating Channels
You can edit multiple channels at once to efficiently manage your lineup.
- On the Channels page, check the boxes next to the channels you wish to modify.
- A "Bulk Edit" menu will appear at the top of the list.
- From here, you can:
- Add/Remove Tags: Add or remove tags in bulk.
- Refresh Streams: This is a powerful feature. If your IPTV provider changes the underlying stream URLs in their master source, this option will pull in the updated URLs for all selected channels without you having to edit them one by one.
- Enable/Disable: Toggle the active status of the channels.
- Delete: Remove the channel mappings.
Syncing with TVHeadend
After you have made changes to your channels, you must sync them with the TVHeadend backend.
- Click the Sync with TVH button at the top of the Channels page.
This action pushes your entire channel lineup, including channel numbers, tags, stream priorities, and EPG links, to TVHeadend, making them available to your clients.
Testing and Diagnostics
Headendarr provides several ways to verify that your channel streams are working correctly and to diagnose performance issues like buffering.
Method 1: Built-in Web Player
You can test any channel stream directly within your browser.
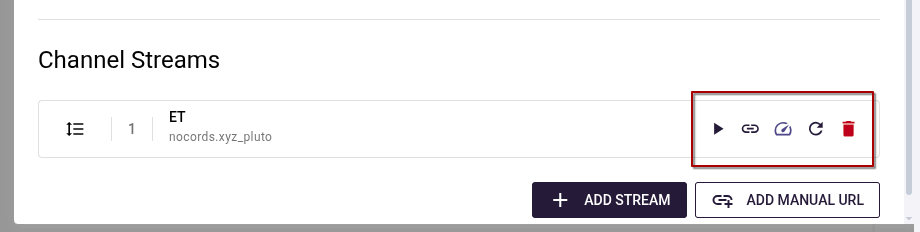
- Open a channel's settings dialog.
- Click the Play button next to a stream URL.
- The floating player will appear, allowing you to watch the live stream.
- The player overlay displays real-time statistics, including the current Resolution and Bitrate.
Method 2: External Player (VLC)
If you suspect a browser-specific issue or want to test with a more robust player:
- Open a channel's settings dialog.
- Click the Copy URL button next to the stream.
- Paste the URL into an external player like VLC.
Method 3: Stream Diagnostics
For detailed performance analysis, use the built-in Stream Diagnostics tool. This is particularly useful if you are experiencing buffering.
- In the channel settings dialog, click the Test Stream button in the header actions.
- The diagnostic tool will run a 20-second sample of the stream.
- Bypass HLS Proxies: If your channel is configured to use an HLS proxy, checking this box allows you to test the original source directly. This is an excellent way to compare performance (e.g., comparing a VPN-routed proxy against a direct local connection) to see exactly where a bottleneck is occurring.
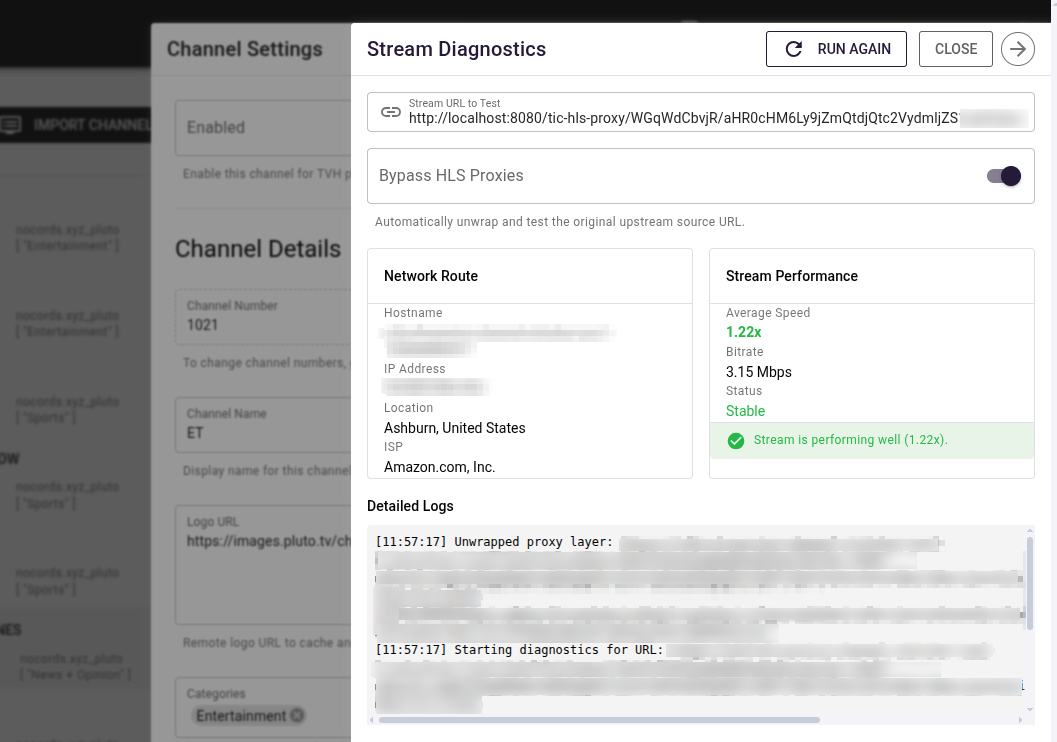
- Review the Average Speed and Bitrate results. A speed consistently below 1.0x is the primary cause of buffering.
For a detailed guide on understanding these results and fixing buffering issues, see the Troubleshooting Stream Stability guide.